Discover 5 Amazing Wood Joints from an 80-Year-Old Craftsman You Need to Try!
5 Wood Joints You Should Try from an Experienced Craftsman
Introduction
If you’ve ever tried to assemble a piece of furniture or create a home project, you know that the strength and stability of your creation often hinges on the joints you use. Various wood joints can enhance the durability and appearance of your project, but choosing the right one can be overwhelming. Whether you’re a seasoned carpenter or a beginner, learning about different wood joints can elevate your DIY skills. Continue reading to discover some essential joints that can transform your woodworking endeavors.
Types of Wood Joints
Understanding the types of wood joints is fundamental for any woodworking project. Below are five popular joints that can serve different purposes in your DIY creations:
1. Butt Joint
The butt joint is one of the simplest joints you’ll encounter. It involves placing two pieces of wood end-to-end or at a right angle without any special shaping.
- Simple construction
- Easy to create
- Ideal for quick projects
2. Miter Joint
The miter joint is made by cutting the ends of two pieces of wood at an angle, typically 45 degrees, to form a corner. This joint is commonly used in picture frames and cabinetry.
- Creates a visually appealing corner
- Requires precise cuts for the best fit
- Often reinforced with glue or splines
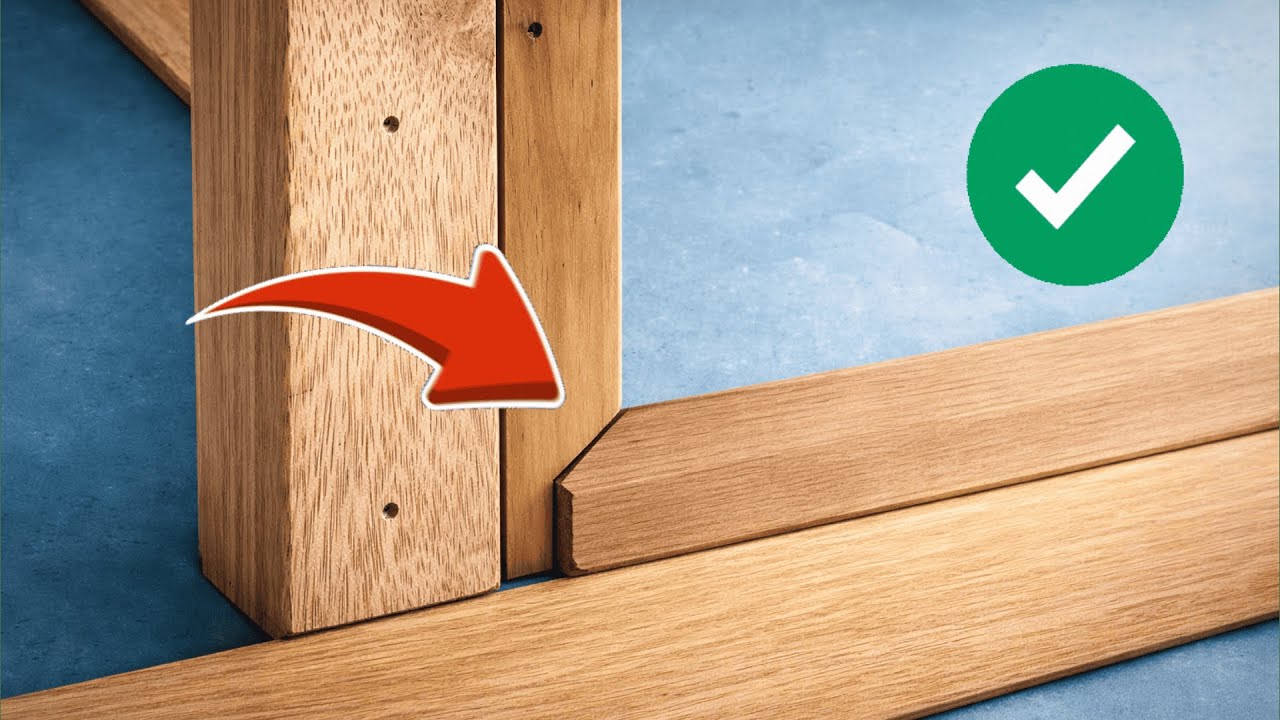
3. Dado Joint
The dado joint is created when a groove is cut into one piece of wood to accommodate another piece. This is an excellent joint for shelving and for structural support.
- Adds strength and stability
- Provides an excellent surface for gluing
- Can accommodate various thicknesses
4. Rabbet Joint
A rabbet joint involves cutting a notch or groove along the edge of a board to allow another board to fit against it. This joint is useful for creating clean edges and surfaces.
- Effective for cabinet construction
- Provides additional glue surface
- Can be used in paneling
5. Finger Joint
The finger joint consists of interlocking pieces of wood, resembling fingers, making it a strong and versatile joint. It is often used in furniture making.
- Creates a large surface area for gluing
- Very strong when done correctly
- Can be aesthetically pleasing
DIY Wood Joints: Step-by-Step Guide
Now that you’re familiar with some common wood joints, let’s dive into how to create them yourself. Here’s a detailed guide:
Butt Joint Creation
- Measure the length of the wood pieces you want to join.
- Cut the ends of the wood squarely using a saw.
- Join the pieces using wood glue and clamps, allowing to dry completely.
Miter Joint Creation
- Set your miter saw to 45 degrees.
- Cut both ends of the wood pieces.
- Align the pieces to check the fit, then glue and clamp them together.
Dado Joint Creation
- Mark the location of the dado on your wood piece.
- Use a table saw or router to cut the groove.
- Test the fit with the other piece and adjust if necessary.
Rabbet Joint Creation
- Measure and mark where the rabbet will be cut.
- Cut along the marked line using a table saw or router.
- Join the pieces and apply wood glue.
Finger Joint Creation
This joint typically requires more advanced techniques and tools, like special jigs, but here’s a simplified version:
- Cut the interlocking fingers using a table saw with appropriate jigs.
- Align the joints and test the fit before gluing.
- Glue and clamp the pieces together to dry.
Common Mistakes to Avoid
When working with wood joints, making mistakes can be costly and frustrating. Here are several common pitfalls to watch out for:
- Incorrect measurements: Always double-check your measurements before cutting.
- Poor cuts: Use the correct tools and techniques to ensure precision.
- Insufficient glue: Don’t skimp on glue; it’s crucial for a strong hold.
- Not allowing proper drying time: Rushing the process can weaken the joint.
- Ignoring wood grain: Be mindful of the grain direction for stronger joints.
FAQ
What is the strongest wood joint?
The finger joint is often considered one of the strongest due to its large gluing area.
Can I use screws with wood joints?
Yes, screws can be used to reinforce many types of joints, providing added strength.
How do I choose the right joint for my project?
Consider the functionality, appearance, and ease of construction when choosing a joint.
Conclusion
Exploring various wood joints can significantly enhance your crafting skills and the quality of your projects. By recognizing their unique characteristics and applications, you’ll be better prepared for your next DIY endeavor. What wood joint are you excited to try first? Share your thoughts in the comments!