80-Year-Old Craftsman’s 5 Insanely Precise Wood Joints You Need to See!
5 Essential Wood Joints Every DIY Enthusiast Should Master
- Introduction
- Required Materials
- Step-by-Step Guides to Wood Joints
- Common Mistakes to Avoid
- FAQ
- Conclusion
Introduction
Imagine you’re in your workshop, surrounded by stacks of wood, tools, and a project idea you’re excited about. However, as you stare at your materials, you realize that you lack the skills for creating sturdy, intricate wood joints. What if you could master these essential techniques and elevate your woodworking game? This guide will take you through five must-know wood joints that can significantly improve your DIY projects. Keep reading to discover the steps involved and valuable tips to ensure your work is both beautiful and functional.
Required Materials
Before diving into the various wood joints, it’s important to gather the necessary materials. Each joint will require some basic tools and supplies:
- Quality wood (e.g., pine, oak, or plywood)
- Wood glue
- Saw (hand saw or circular saw)
- Chisel set
- Measuring tape and square
- Clamps for securing joints
Having these materials on hand will make the process much smoother. Now, let’s explore the step-by-step guides for creating these essential joints.
Step-by-Step Guides to Wood Joints
Here are some of the most important wood joints that will enhance your projects. Each technique comes with its own unique benefits and uses.
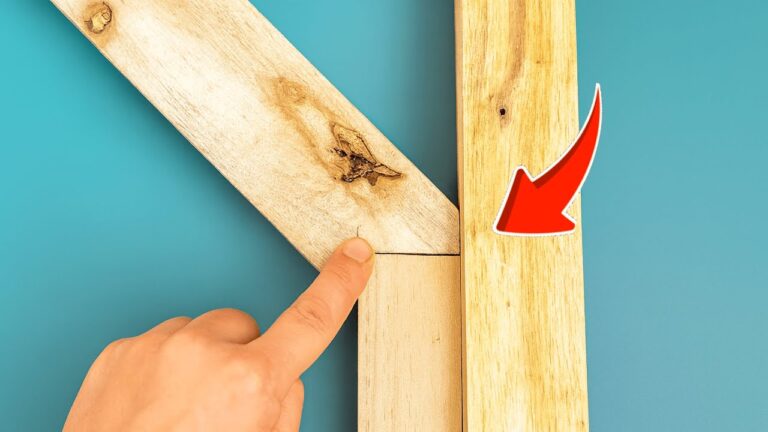
1. Butt Joint
The butt joint is one of the simplest wood joints and is commonly used in cabinetry and furniture making.
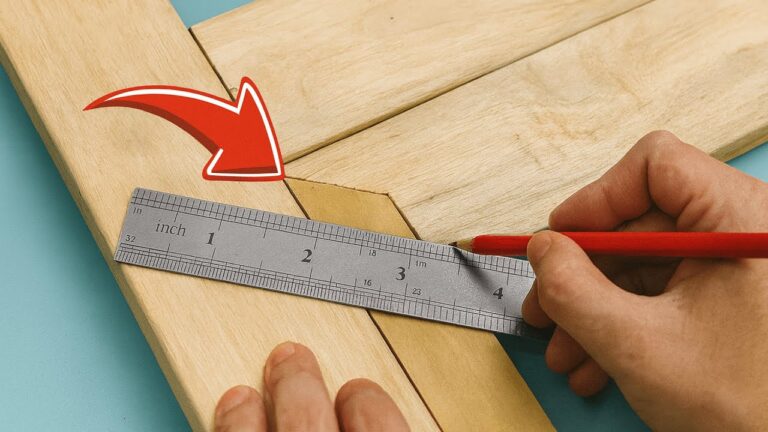
- Measure the lengths of your wood pieces accurately.
- Cut the ends of the pieces to be joined at a right angle.
- Apply wood glue on the edge of one piece.
- Join the pieces together and use clamps to secure them as the glue sets.
This joint is best when supported or reinforced by nails or screws.
2. Miter Joint
The miter joint is a great choice for projects requiring angled edges, such as frames.
- Measure the lengths of both pieces carefully.
- Set your saw to a 45-degree angle and make your cuts.
- Align the angled ends and apply wood glue.
- Clamp the joint until the glue dries.
This joint excels in aesthetics and is perfect for trim work.
3. Dovetail Joint
The dovetail joint is renowned for its durability and is commonly used in drawer construction.
- Mark the tails and pins on both pieces of wood.
- Cut along the marked lines using a saw and chisel.
- Fit the pieces together, ensuring a snug fit.
- Glue and clamp the joint until dry.
This joint is both strong and visually appealing.
4. Mortise and Tenon Joint
This traditional joint is often used in heavy furniture and frame constructions.
- Mark the mortise locations on one piece and the tenon on the other.
- Cut the mortises and tenons accurately with a chisel and saw.
- Fit the tenon into the mortise, ensuring it’s snug.
- Glue and secure the joint with clamps.
A reliable choice for strong connections in construction.
5. Lap Joint
Lap joints are perfect for frameworks where strong, flat surfaces are needed.
- Overlap two wood pieces either fully or partially.
- Cut them to create a clean edge on the overlapping section.
- Apply wood glue to the contact area.
- Clamp the joint securely while it dries.
This joint is simple yet effective for various woodworking projects.
Common Mistakes to Avoid
When working with wood joints, it’s easy to make mistakes that can affect the integrity of your projects. Here are some common pitfalls to watch for:
- Inaccurate measurements: Always double-check before cutting your pieces.
- Insufficient glue: Ensure there’s enough adhesive for a strong bond.
- Overlooking drying time: Rushing can compromise the strength of the joint.
- Ignoring wood grain direction: Align joints with the wood grain for maximum strength.
Acknowledging these mistakes can save you time and frustration in your projects.
FAQ
What type of joint is the strongest?
The dovetail joint is often considered one of the strongest due to its interlocking design, providing durability and resistance to pulling apart.
Can I use screws with wood joints?
Yes, screws can enhance the strength of most wood joints, particularly for butt joints and lap joints, providing additional stability.
What type of wood is best for joints?
Hardwoods like oak or maple are excellent choices for joints due to their strength and durability, but softwoods like pine are also suitable for lighter projects.
Conclusion
Understanding these five essential wood joints opens up a world of possibilities for your DIY projects. With the right techniques and materials, you can create strong and beautiful pieces for your home. Which wood joint are you most excited to try? Share your thoughts in the comments!