80-Year-Old Craftsman Reveals 1 Perfect Wood Joint That Will Amaze You!
The Perfect Wood Joint You Can Master at Home
- Introduction
- Understanding Wood Joints
- Materials Needed
- Step-by-Step Guide
- Common Mistakes to Avoid
- FAQs
- Conclusion
Introduction
When embarking on a woodworking project, the importance of a solid wood joint cannot be overstated. Imagine spending hours crafting a beautiful piece only to have it fall apart because of poor jointing. This frustrating scenario can lead to wasted time and materials. Understanding how to create a strong wood joint is essential for every woodworker, whether you’re a beginner or have some experience. Keep reading to discover the perfect wood joint technique that will elevate your projects.
Understanding Wood Joints
A wood joint is a method used to connect two pieces of wood together. There are various types of wood joints, each suited for different applications. Three common types include:
- Butt joint: Simple and easy to create, this joint involves aligning two pieces of wood at their ends.
- Dado joint: This joint features a groove cut into one piece of wood, allowing another piece to fit snugly within.
- Mortise and tenon joint: A traditional joint used for furniture, where one piece has a slot (mortise) and the other has a corresponding tongue (tenon) that fits into it.
Mastering these joints will enhance your woodworking skills and lead to more durable projects.
Materials Needed
Before you begin, gather the following materials and tools, which are essential for creating a strong wood joint:
- Wood pieces: Choose high-quality, straight-grained wood for optimal results.
- Wood glue: A strong adhesive is crucial for reinforcing the joint.
- Clamps: These will hold the joints firmly together while the glue dries.
- Chisel: For precision cuts if working with mortise and tenon joints.
- Saw: A handsaw or miter saw will help you achieve accurate cuts.
Step-by-Step Guide
Creating a strong wood joint involves careful measurement and execution. Follow these steps to successfully create a classic mortise and tenon joint:
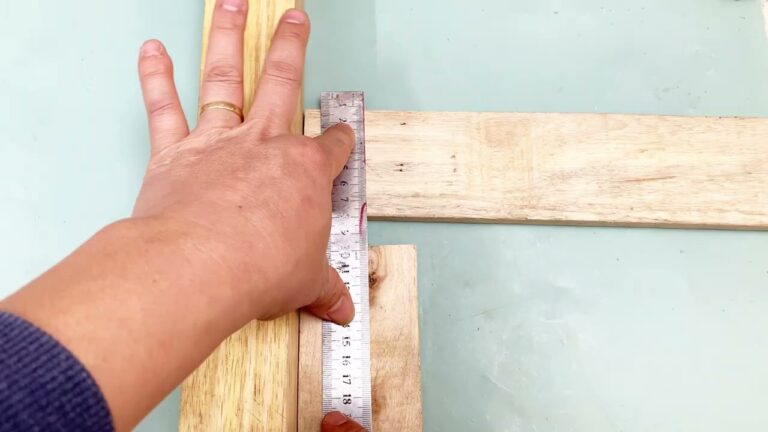
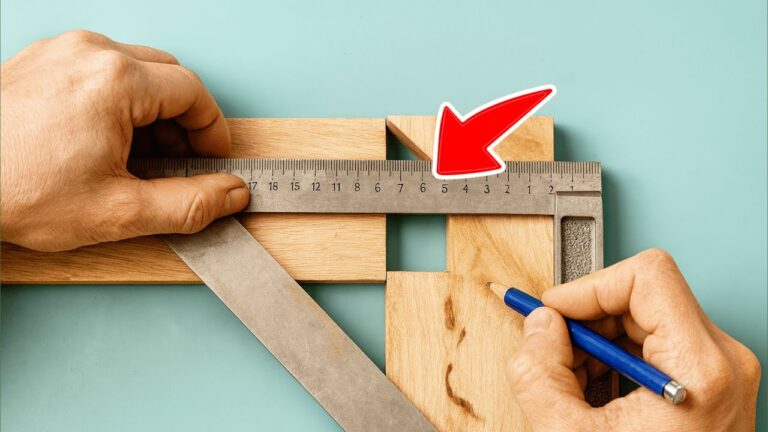
Step 1: Measure and Mark
Begin by measuring the lengths and widths of the pieces you wish to join. Use a pencil to mark the positions clearly:
- Determine the length of the tenon—this is usually about one-third the thickness of the wood.
- Mark the mortise location, ensuring it aligns with the tenon’s position.
Step 2: Cut the Joint
With the measurements in place, it’s time to cut:
- Cut the tenon: Use your saw to create the tenon on your selected piece of wood.
- Chisel the mortise: At the location you marked, use the chisel to create a groove for the tenon.
Step 3: Test Fit
Before applying glue, test the fit of the tenon in the mortise:
- Ensure the tenon slides into the mortise smoothly.
- Make adjustments if necessary for a snug fit.
Step 4: Glue and Clamp
Once satisfied with the fit, it’s time to combine them:
- Apply glue: Place a thin layer of wood glue on the tenon.
- Insert the tenon: Gently press the tenon into the mortise.
- Clamp them together: Securely clamp the joint to allow the glue to set.
Step 5: Finish the Joint
After the glue dries, you can sand the joint for a smooth finish:
- Use fine-grit sandpaper to smooth out any rough edges.
- Apply your desired finish to enhance the wood’s natural beauty.
Common Mistakes to Avoid
When working with wood joints, it’s easy to make missteps. Here are some common pitfalls to steer clear of:
- Not measuring accurately: Inaccurate measurements can lead to poor fit and alignment.
- Using insufficient glue: Failing to add enough glue can weaken the joint.
- Skipping the test fit: Always check that the tenon fits properly before gluing.
- Neglecting to clamp: Clamping is crucial for ensuring a strong bond as the glue dries.
FAQs
What type of wood is best for joints? High-quality hardwoods like oak or maple are ideal due to their strength and durability.
How long should I let glue dry before removing clamps? Typically, allow at least 30 minutes for initial bonding but check the manufacturer’s recommendations for best results.
Can I use this joint for outdoor furniture? Yes, but ensure you use weather-resistant wood and glue for outdoor projects.
Conclusion
Mastering the perfect wood joint is invaluable in woodworking, vastly improving the strength and aesthetics of your projects. With the right techniques and a bit of practice, you can create joints that stand the test of time. What type of project are you excited to tackle using this joint technique? Share your thoughts in the comments!