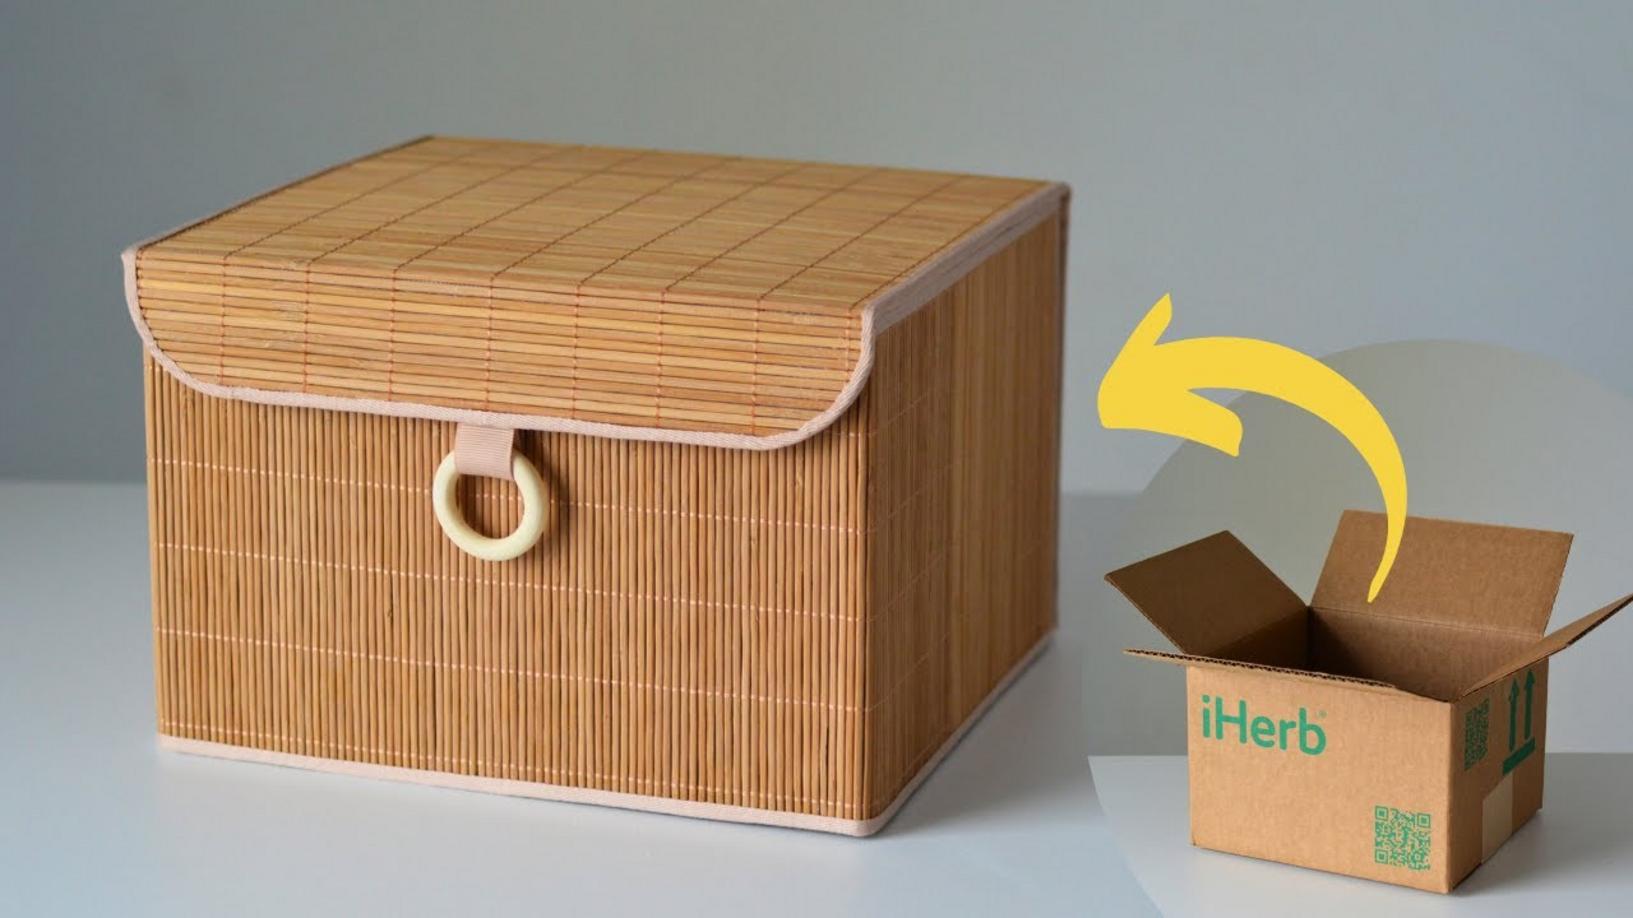
This simple technique transforms an ordinary box into a chic storage solution…
This Simple Technique Transforms an Ordinary Box into a Chic Storage Solution
Are you ready to elevate your storage game? With just a few simple materials, you can create an amazing **storage basket with a lid** that’s both functional and stylish. This DIY project not only helps you organize your space but also offers a touch of creativity to your home decor.
Supplies You’ll Need
- Cardboard box
- Heavy-duty cotton fabric
- Bamboo placemat
- Double-sided adhesive tape (thin)
- Herringbone cotton ribbon
- Grosgrain ribbon (2 cm wide)
- Wooden ring (diameter 4 cm)
- Hook and loop tape (Sew on fabric Velcro tape, 2 cm wide)
- Polymer glue
- All-purpose adhesive “UHU”
Step-by-Step Instructions
1. Prepare Your Cardboard Box
Start by choosing a **cardboard box** that fits your space. Ensure it is sturdy enough to hold your items. If needed, reinforce it with additional tape for added durability.
2. Measure and Cut Your Fabric
Measure the outer dimensions of your box and cut the **heavy-duty cotton fabric** accordingly. Leave a bit of extra fabric on each side for folding over the edges.
3. Adhere the Fabric to the Box
Apply **double-sided adhesive tape** around the box’s edges. Carefully lay the fabric on the tape, smoothing it out to avoid wrinkles. Fold the excess fabric over to create a clean look.
4. Create the Lid
Using the **bamboo placemat**, cut it to fit the top of your box. Secure it in place using **polymer glue**. This will give your storage basket a chic, finished appearance.
5. Add Decorative Touches
Wrap the **herringbone cotton ribbon** around the box at the center for a decorative flair. Use **grosgrain ribbon** to create bows or accents on the lid. Secure them with hot glue for durability.
6. Attach the Wooden Ring
For easy lifting, glue the **wooden ring** to the lid. This will not only provide convenience but also enhance the aesthetic appeal of your **storage basket**.
7. Final Touches with the Velcro
To keep the lid secure, sew on the **hook and loop tape** to both the box and the lid. This simple addition ensures that your items remain safely stored inside.
Common Mistakes to Avoid
- Using low-quality cardboard: Ensure your box is strong enough to support the items you plan to store.
- Not measuring accurately: Always double-check your measurements before cutting fabric to avoid wastage.
- Skipping the reinforcement: Reinforce the box if it feels flimsy, especially if you’re storing heavier objects.
Conclusion
Making an awesome **storage basket** from a simple cardboard box is not just easy; it’s incredibly rewarding! This project lets you express your creativity and declutter your space. So gather your supplies and get crafting today! For inspiration and more such DIY tutorials, check out my other basket and organizer projects linked above.
Don’t forget to share your beautiful creations on social media, and let’s turn that ordinary box into a chic storage solution together!